SDK Quick Start (SF52X SF56X)
1. Development Tool Setup
Required Software
Sifli env and SiFli SDK (Download from Weiyun).
Keil V5.32 or above, armcc V6 or above.
Segger Jlink, V6.80a or above.
Jlink Download LinkCode editing software: VSCode or Source Insight.
Serial log viewing tool: Use the SDK’s built-in sifliTrace or sscom.
Required Hardware
Windows PC x1
ARM Emulator x1
Note
There is a conflict between the power supply of the emulator and the HDK board, so you need to disable the emulator’s power supply. If the emulator connection fails, check the power supply jumper on the Jlink.
The following image shows the common Jlink power supply jumper that needs to be removed.

USB Type-C Cable x2
Used to connect the ARM emulator and the USB2UART debug board to power the HDK board and capture HDK serial log data.USB2UART Debug Board x1 (SIFLI-Debug001-V1.1.0).
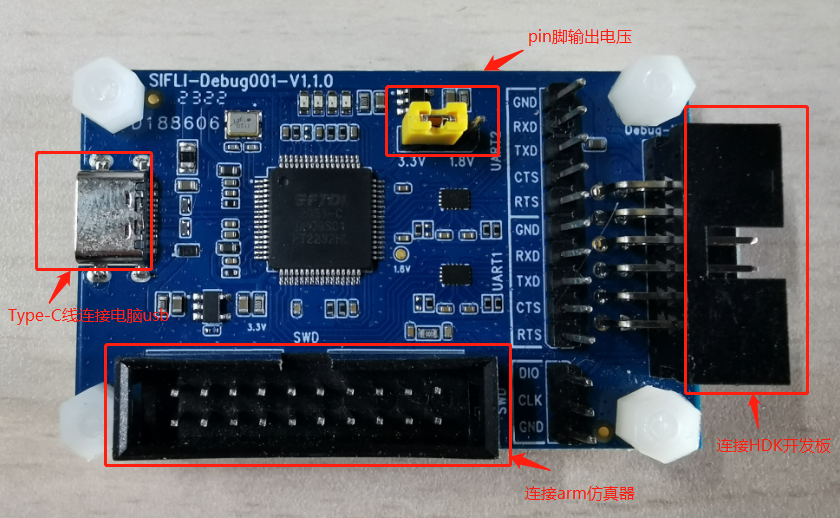
Overview of the USB2UART Debug Board
HDK Development Board x1 set
Includes an HDK CPU board (SF56X or SF52X) and a screen sub-board (the model of the sub-board varies depending on the screen).
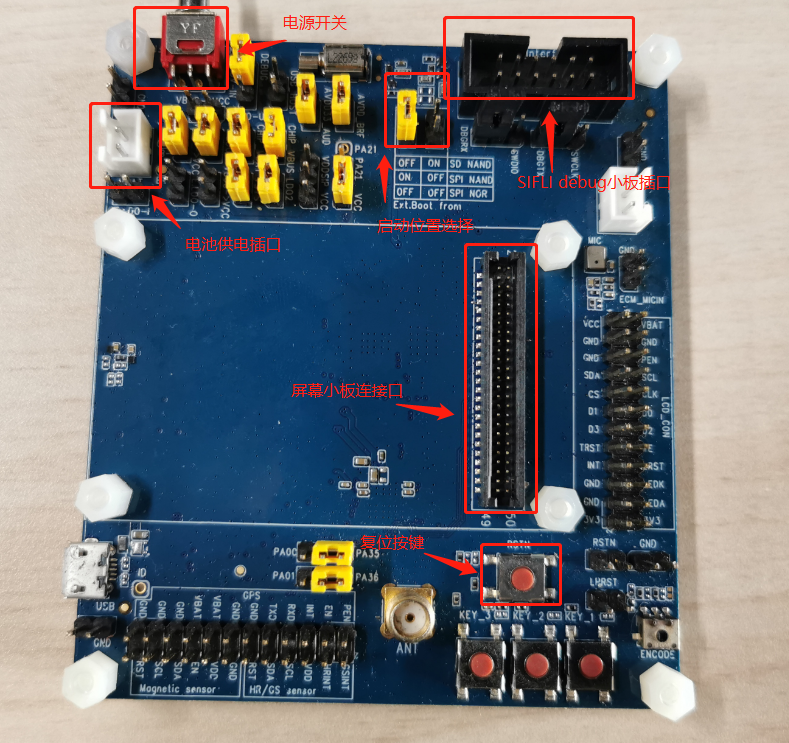
HDK52x Development Board Interface Overview
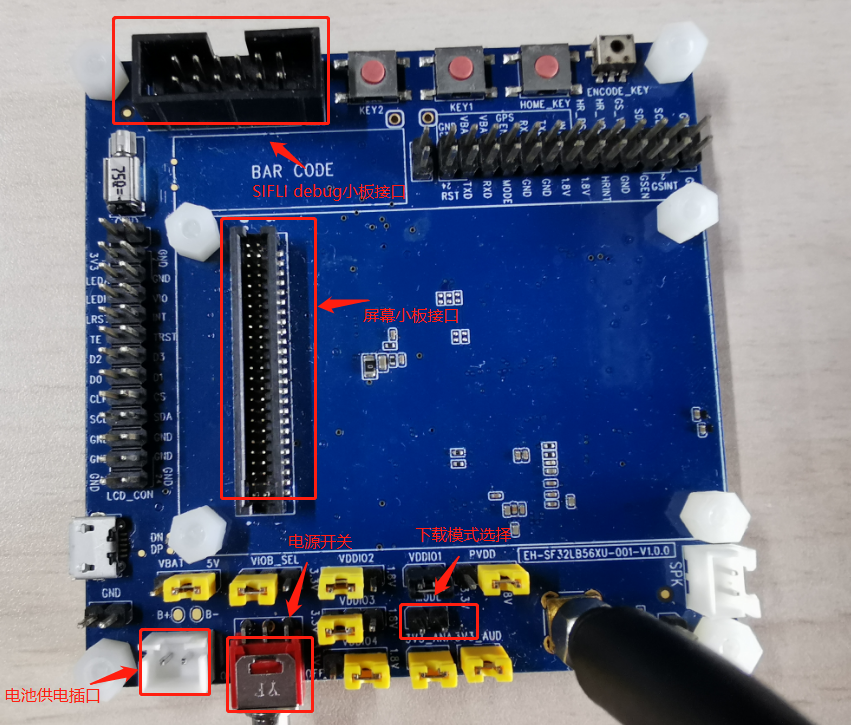
HDK56x Development Board Interface Overview
Screen Sub-board Interface Overview

2. Development Environment Configuration
Configuring the ENV
Extract the env to your PC, for example to D:\work\env.
Enter the env directory and run env.exe in this directory. If it fails to open, try using env.bat.
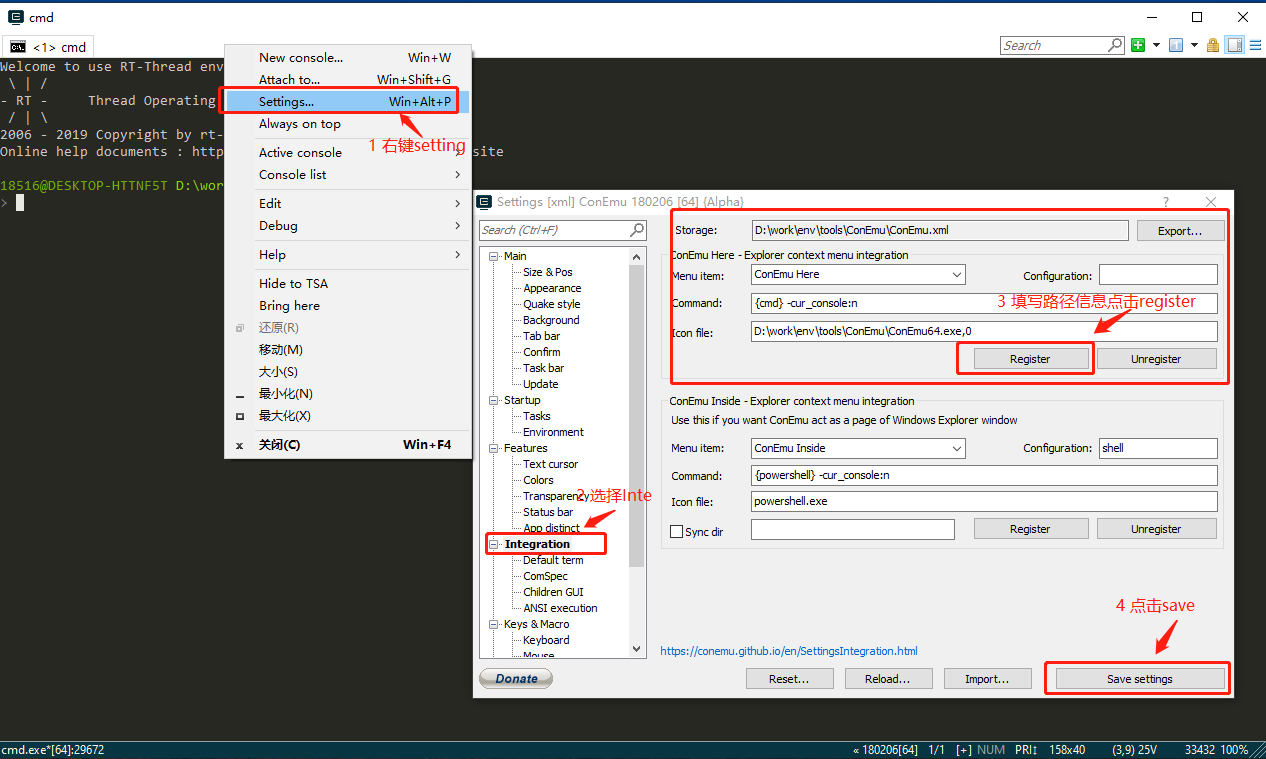
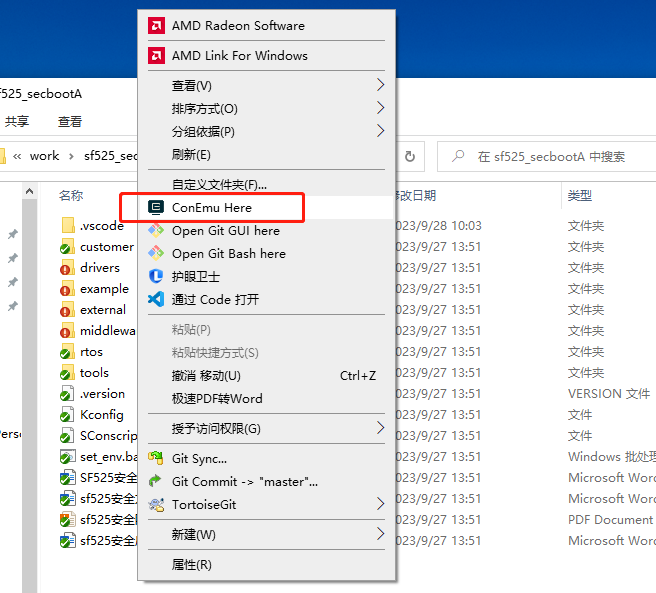
Right-click on the associated folder and select the “ConEmu Here” menu.
Add ConEmu Here to the right-click menu
Right-click any folder to open ConEmu Here
Installing Keil
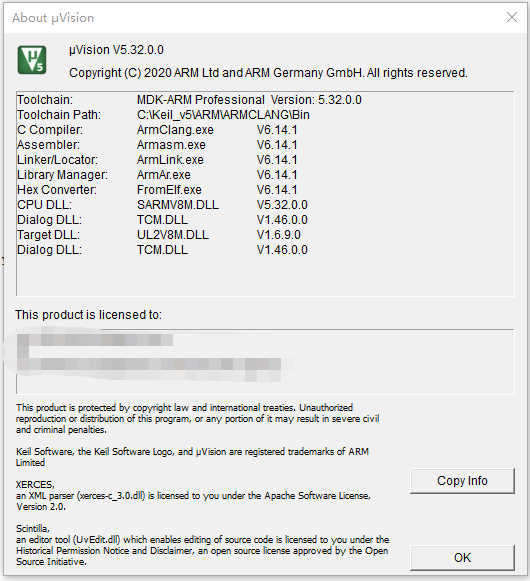
Double-click the Keil installer and follow the prompts to install it. Note that Keil should be installed to the C:\Keil_v5 directory. After starting Keil, open Help->>About,
If the displayed version is not v5.32, uninstall Keil and install the latest version.
After installing Keil, add the ARM path to the Windows environment variable PATH, for example: C:\Keil_v5\ARM\ARMCLANG\bin.
Installing JLink
Jlink needs to be installed with version v6.80a or later. Double-click the installer JLink_Windows_V680a.exe, select the default installation path, and add the JLink path to the Windows environment variable PATH,
For example: C:\Program Files (x86)\SEGGER\JLink.
Copy all ELF files from the $SDK_ROOT\tools\flash\jlink_drv\sf32lbxx directory to the Devices\SiFli directory in the JLink installation path. The SiFli directory must be manually created.
After copying, it should look like the following.
Add Jlink drivers to Jlink installation directory 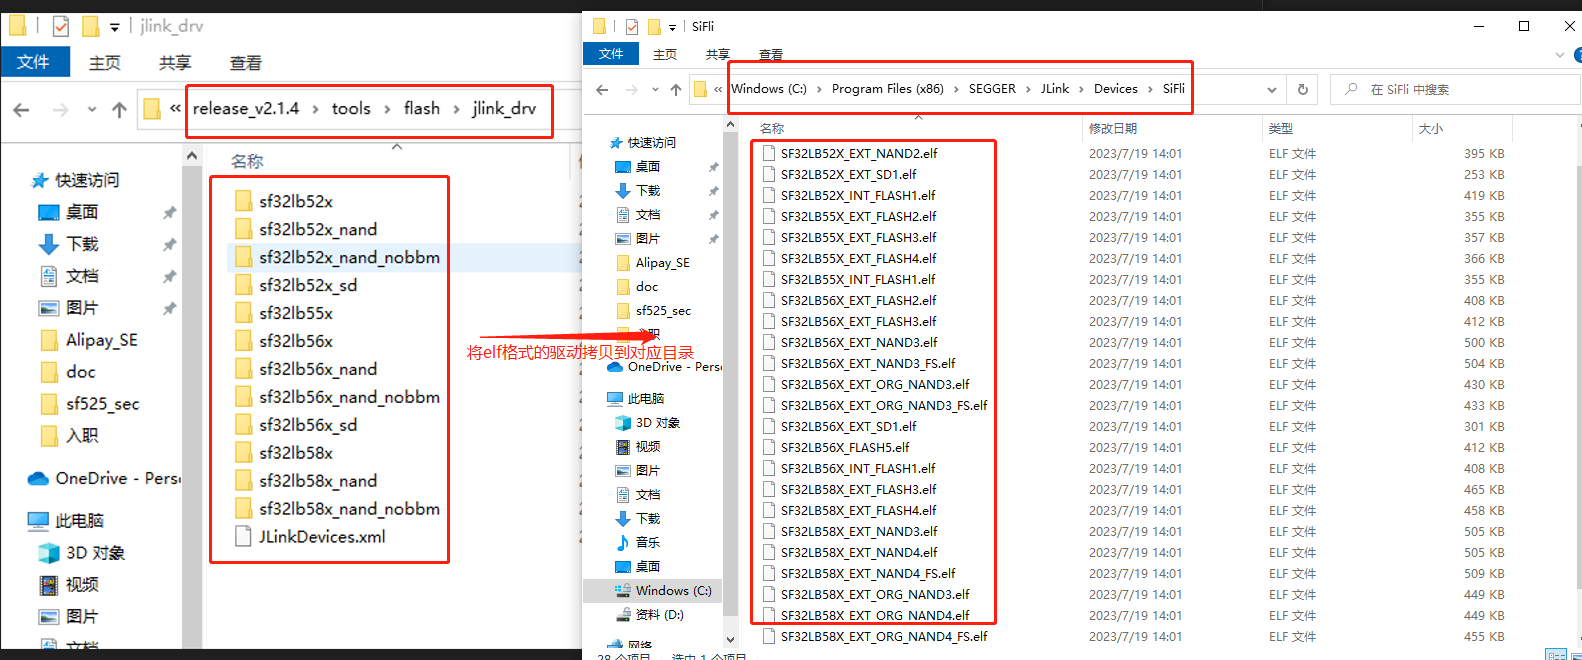
Merge the SiFli-related content from JLinkDevices.xml in the jlink_drv directory into the JLinkDevices.xml in the JLink installation directory.

Modify the JLinkDevice file 
Configuring System Environment Variables
Add the following paths to the PATH variable in system environment variables. The actual paths need to match the local tool and code paths.
Add environment variable PATH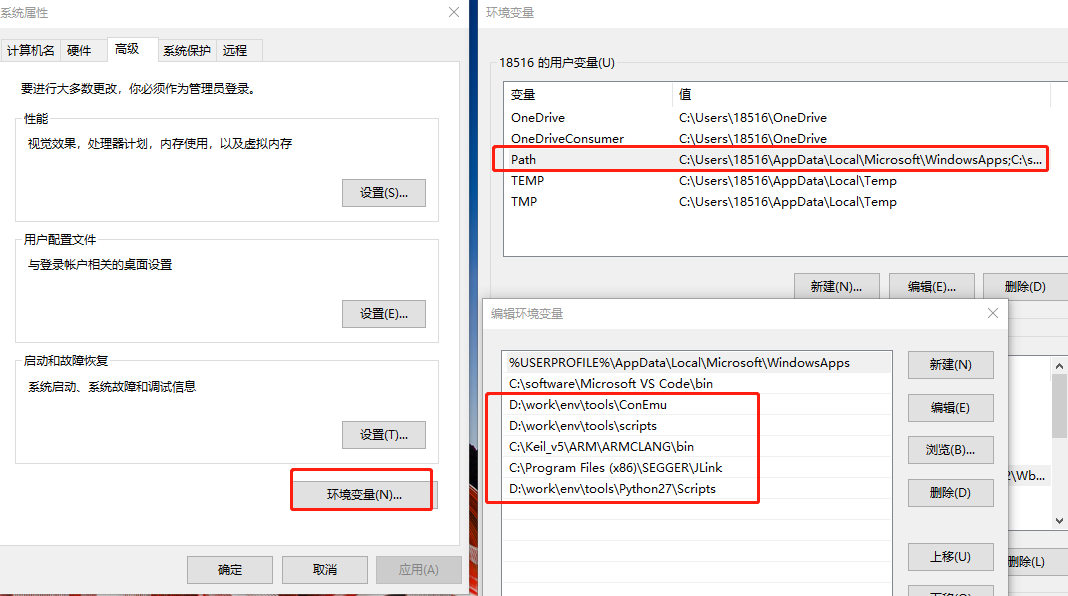
3. Compiling Project Code
SF52X Project Code Compilation
Using the sf525 project under the hal_example as an example, the compilation steps are as follows:
Go to the SDK root directory, $SDK_ROOT, right-click and select “ConEmu Here”.
Execute the script
.\set_env.bat_to configure the environment.Enter the compilation directory:
cd example\hal_example\project\commonExecute the compile command:
scons --board=eh-lb525_v2_hcpu -j8
Note
--board=xx specifies the board information. You can choose a directory from customer\boards with a directory name containing “v2” and add hcpu to the end, for example, eh-lb525_v2_hcpu.
After compilation, a folder build_eh-lb525_v2_hcpu will be created under the common directory, storing the generated images and other files.
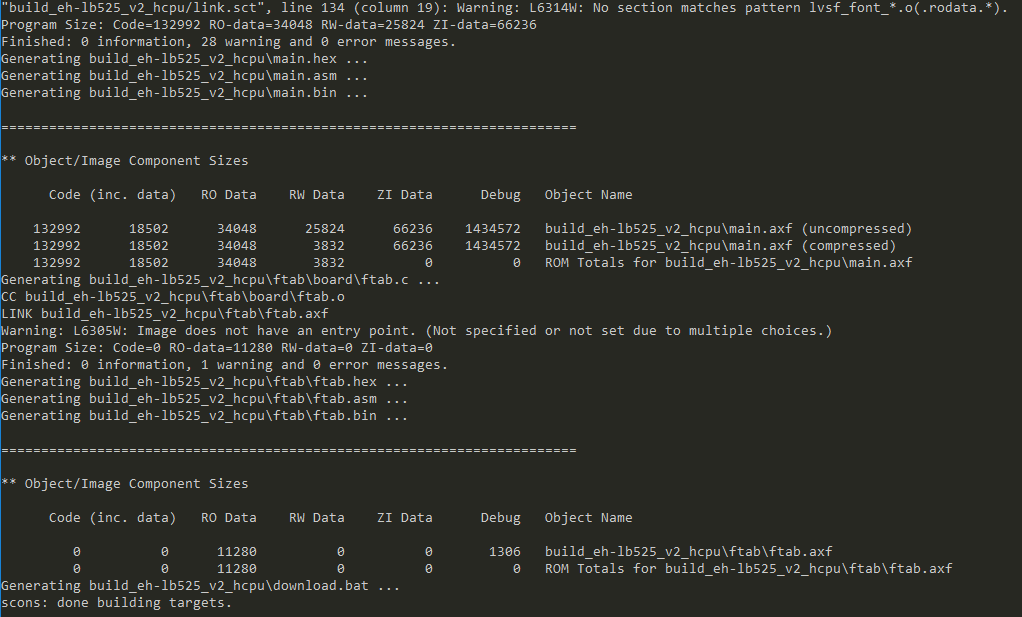
SF56X Project Code Compilation
Using the sf561 project under the hal_example as an example, the compilation steps are as follows:
Go to the SDK root directory, right-click and select “ConEmu Here”.
Execute the script
.\set_env.batto configure the environment.Enter the compilation directory:
cd example\hal_example\project\commonExecute the compile command:
scons --board=eh-lb561_v2_hcpu -j8
Note
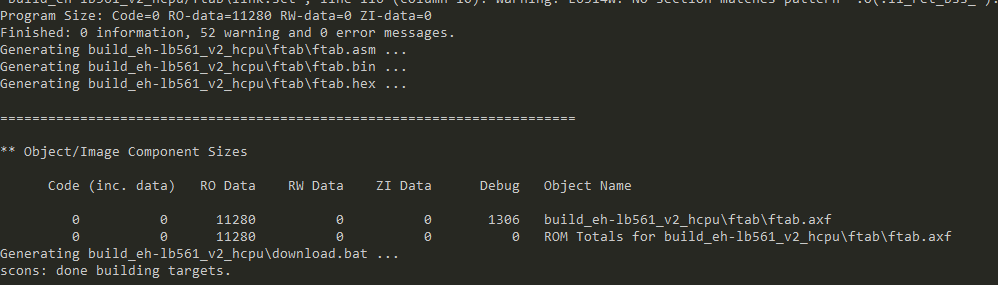
--board= xx specifies the board information. You can choose a directory from customer\boards with a directory name containing “v2” and add hcpu to the end, for example, eh-lb561_v2_hcpu.
After compilation, a folder build_eh-lb561_v2_hcpu will be created under the common directory, storing the generated images and other files.
4. Download and Flash HDK
SF52X Project Image Download and Flash
The sf525 uses UART interface to download the image. Connect the HDK board to the siflideubg debug board, then use the USB Type-C cable to connect the siflideubg debug board to the computer. First, confirm the COM port of the CPU’s log output, for example, COM4.
Close the serial log tool’s COM port.
In the compilation directory, run the download script
.\build_eh-lb525_v2_hcpu\uart_download.bat.It will prompt you to input the COM port used for downloading. Enter 4 and press Enter to start the download.
Downloading SF525 Image

SF561 Project Image Download and Flash
The sf561 uses JLink to download the image. Connect the HDK board to the siflideubg debug board, then connect the siflideubg debug board to the computer for serial log printing. Connect the ARM emulator to the siflideubg debug board using the JLink ribbon cable, and the other end of the ARM emulator should be connected to the computer via Type-C.
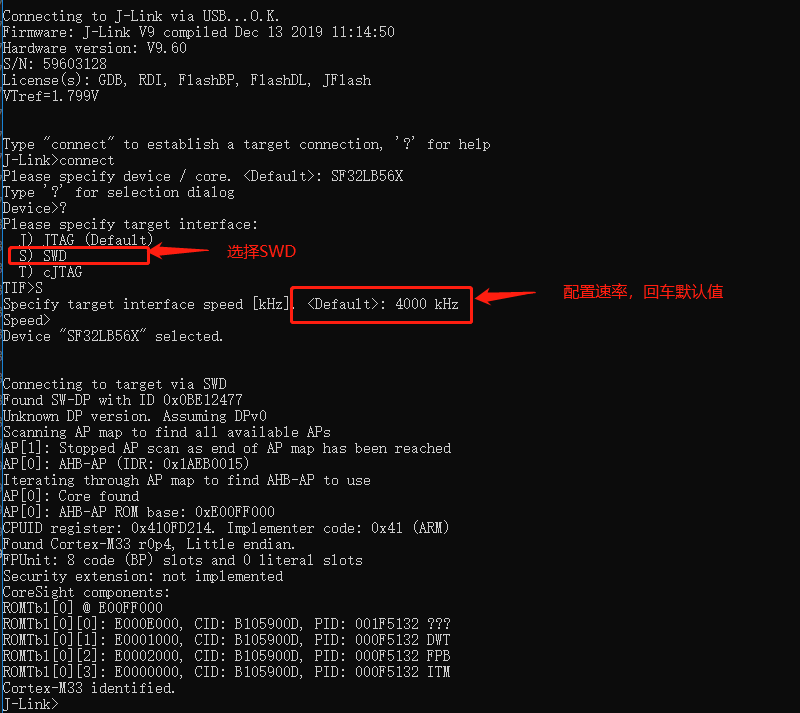
Use J-Link Commander to send the
connectcommand and check if the development board can connect successfully.
Note
The device name chosen during connect should match the JLINK_DEVICE in the rtconfig.py file in the project directory. For example, select SF32LB56X for the sf561 project. After selecting the device, choose the interface (SWD), then configure the transmission rate with the default settings. Once connected successfully, you will see the following.
SF561 Connecting to JLink

In the compilation directory, run the download script
.\build_eh-lb561_v2_hcpu\download.batto start JLink downloading.
Downloading SF561 Image

