LVGL v8 Official Examples
Source path: example/multimedia/lvgl/lvgl_v8_examples
Supported Platforms
sf32lb52-lchspi-ulpSF32LB52x LCD development boards
SF32LB56x LCD development boards
SF32LB58x LCD development boards
All platforms listed above can run the standard LVGL examples. The SJPG example additionally
requires a board with an SPI-connected TF card slot and the corresponding SPI bus, TF card
device, and file-system configuration. The instructions below use sf32lb52-lchspi-ulp;
select the appropriate board name and hardware settings when using another board.
Introduction
This project builds and runs the official LVGL v8 examples. The example sources are under
src/examples, and src/examples/lv_examples.h provides the available example functions.
By default, src/main.c calls lv_example_scroll_1(). This example demonstrates horizontal
and vertical scrolling when child content extends beyond the visible area.
Switching Examples
Open src/main.c and locate the example calls:
lv_example_scroll_1();
// lv_example_grid_1();
Comment out the current example and uncomment the one to run. For example, to select
lv_example_grid_1():
// lv_example_scroll_1();
lv_example_grid_1();
Rebuild and flash the project after changing the example.
Build and Flash
Change to the example’s project directory and run the SCons build:
scons --board=sf32lb52-lchspi-ulp -j8
Run the UART flashing script:
build_sf32lb52-lchspi-ulp_hcpu\uart_download.bat
Enter the serial port number when prompted:
please input the serial port num:5
PC Simulator
The PC configuration is under project/pc_hcpu. First update msvc_setup.bat in the SDK root
to match the local MSVC installation, then run the following command from project:
scons --board=pc_hcpu -j8
When the build completes, run build_pc_hcpu/main.exe.
Optional Example: Display an SJPG Image
This section switches the project to lv_example_sjpg_1(), which loads and displays
small_image.sjpg from a TF card. This is not the default example, so configure the required
features and select the example function as described below.
Hardware Requirements
A supported board with an SPI-connected TF card interface
A USB cable that supports data transfer
A TF card and a card reader
Preparing the Image
Copy src/examples/libs/sjpg/small_image.sjpg to the root of the TF card file system. The
example opens the image from the following path:
lv_img_set_src(wp, "A:small_image.sjpg");
Configuring the Project
Run the following command from project:
sdk.py menuconfig --board=sf32lb52-lchspi-ulp
Confirm that the resulting configuration contains:
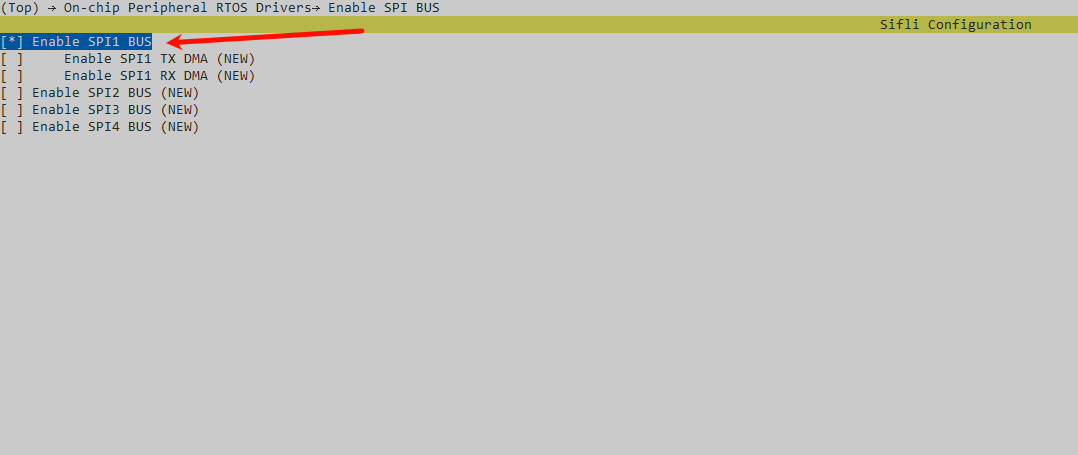
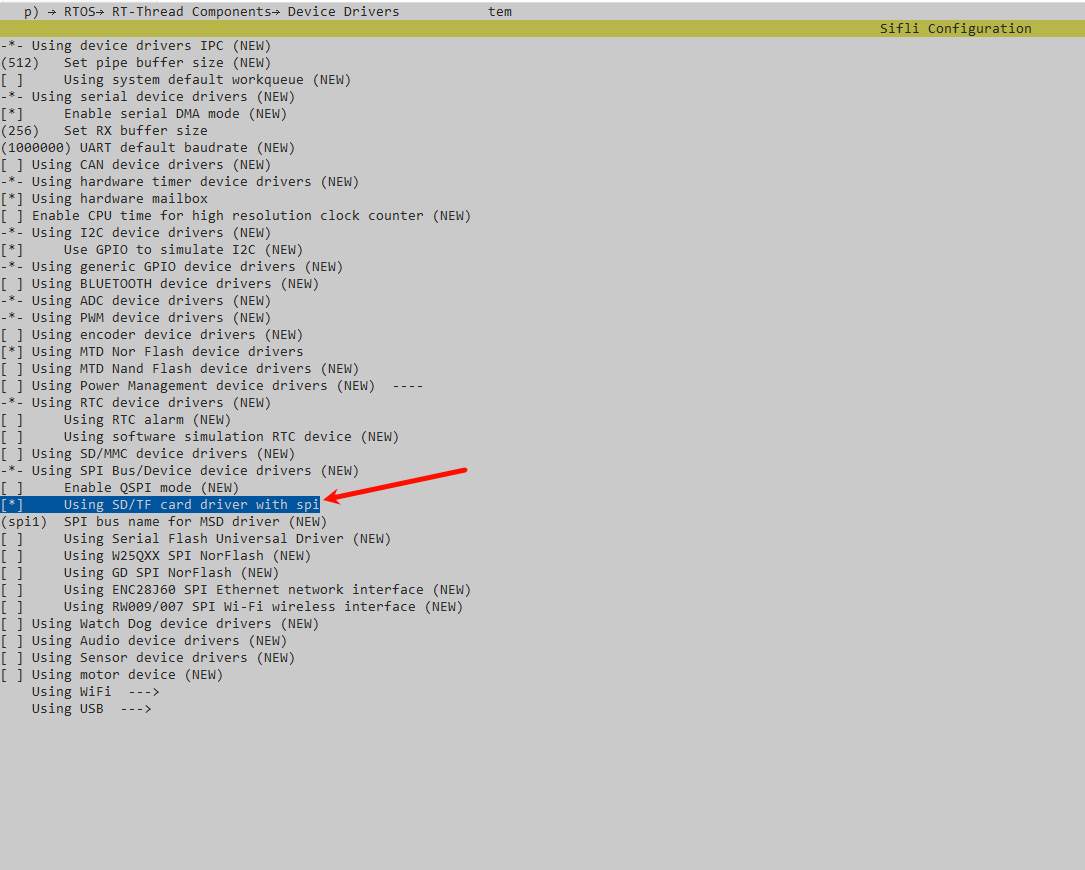
CONFIG_RT_USING_SPI_MSD=y
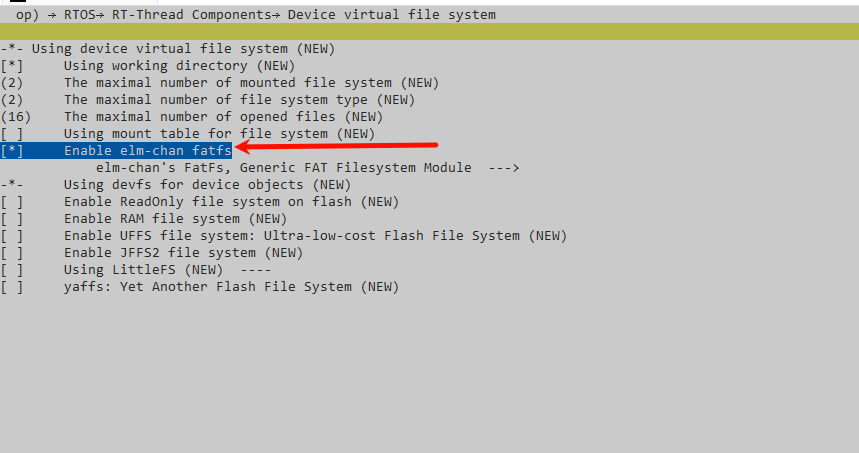
CONFIG_RT_USING_DFS_ELMFAT=y
CONFIG_LV_USE_FS_POSIX=y
CONFIG_LV_FS_POSIX_LETTER=65
CONFIG_LV_USE_SJPG=y
CONFIG_LV_FS_POSIX_LETTER=65 assigns drive letter A to the LVGL file-system driver.
Configure the options as follows:
Enable the SPI bus.
Configure the TF card device on the SPI bus.
Enable the ELM FAT file system.
Enable the LVGL POSIX file-system interface and SJPG decoder, then set the drive letter to
A.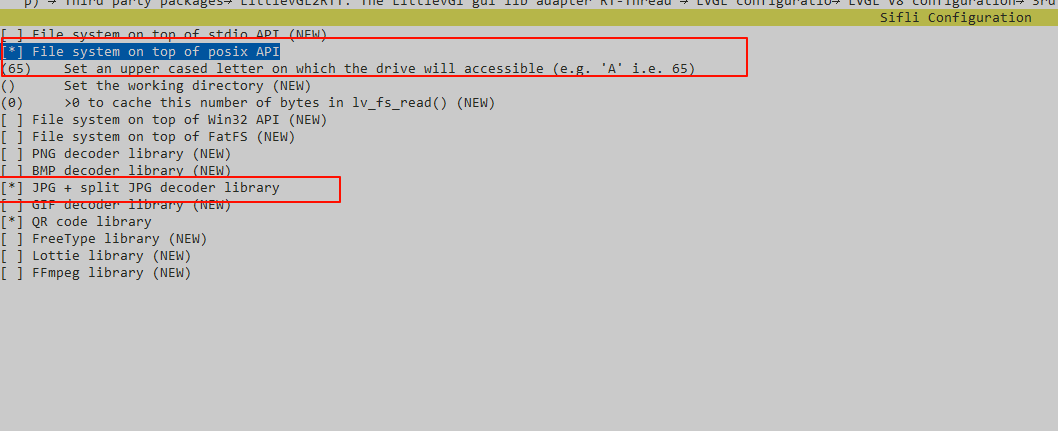
Switching the Example
Update src/main.c:
// lv_example_scroll_1();
lv_example_sjpg_1();
Building and Flashing
Run the following command from project:
scons --board=sf32lb52-lchspi-ulp -j8
To flash over UART, run:
build_sf32lb52-lchspi-ulp_hcpu\uart_download.bat
Enter the serial port number when prompted:
please input the serial port num:5
Warning: If mounting the TF card’s root file-system region fails,
src/main.ccallsdfs_mkfs()and formats that region automatically. This may erase data in the region. Back up important data before running the example, and verify that the TF card and SPI interface are working correctly.
Expected Output
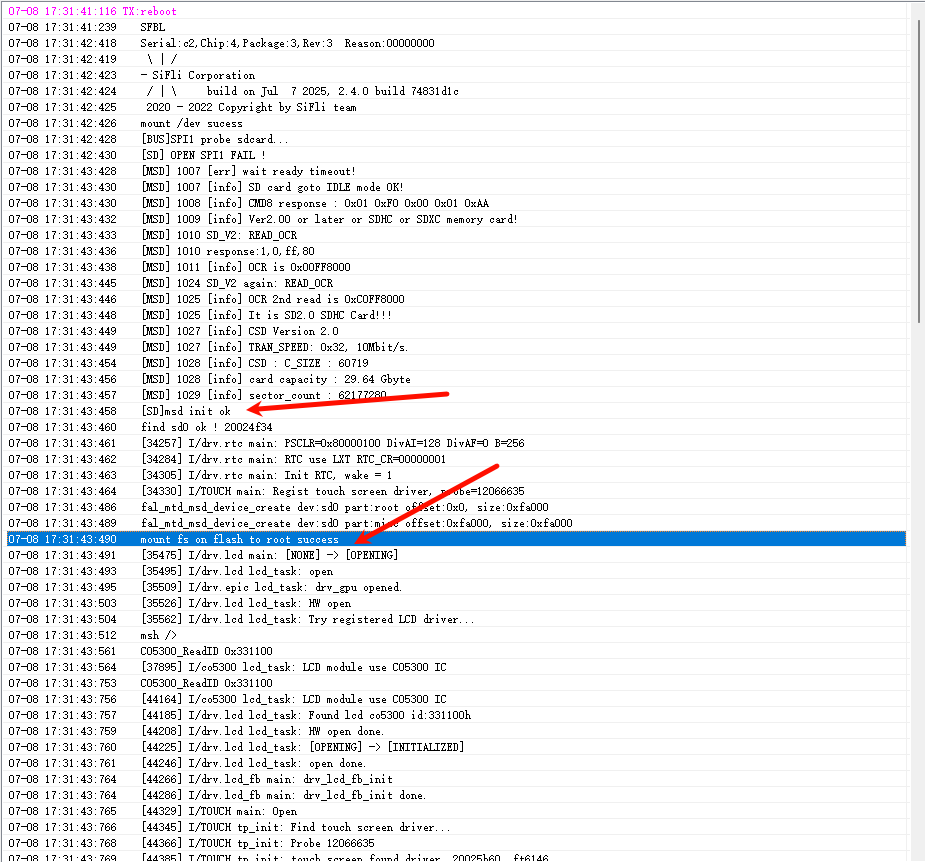
After inserting the TF card, the log message mount fs on flash to root success indicates
that the file system was mounted successfully.
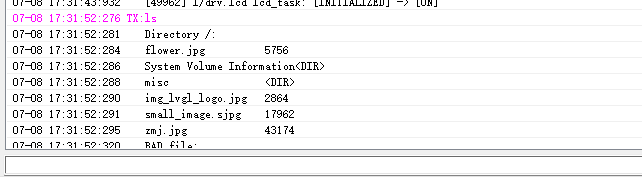
At the Finsh prompt, run ls to list the image files in the TF card root directory.
The displayed image should look like this:
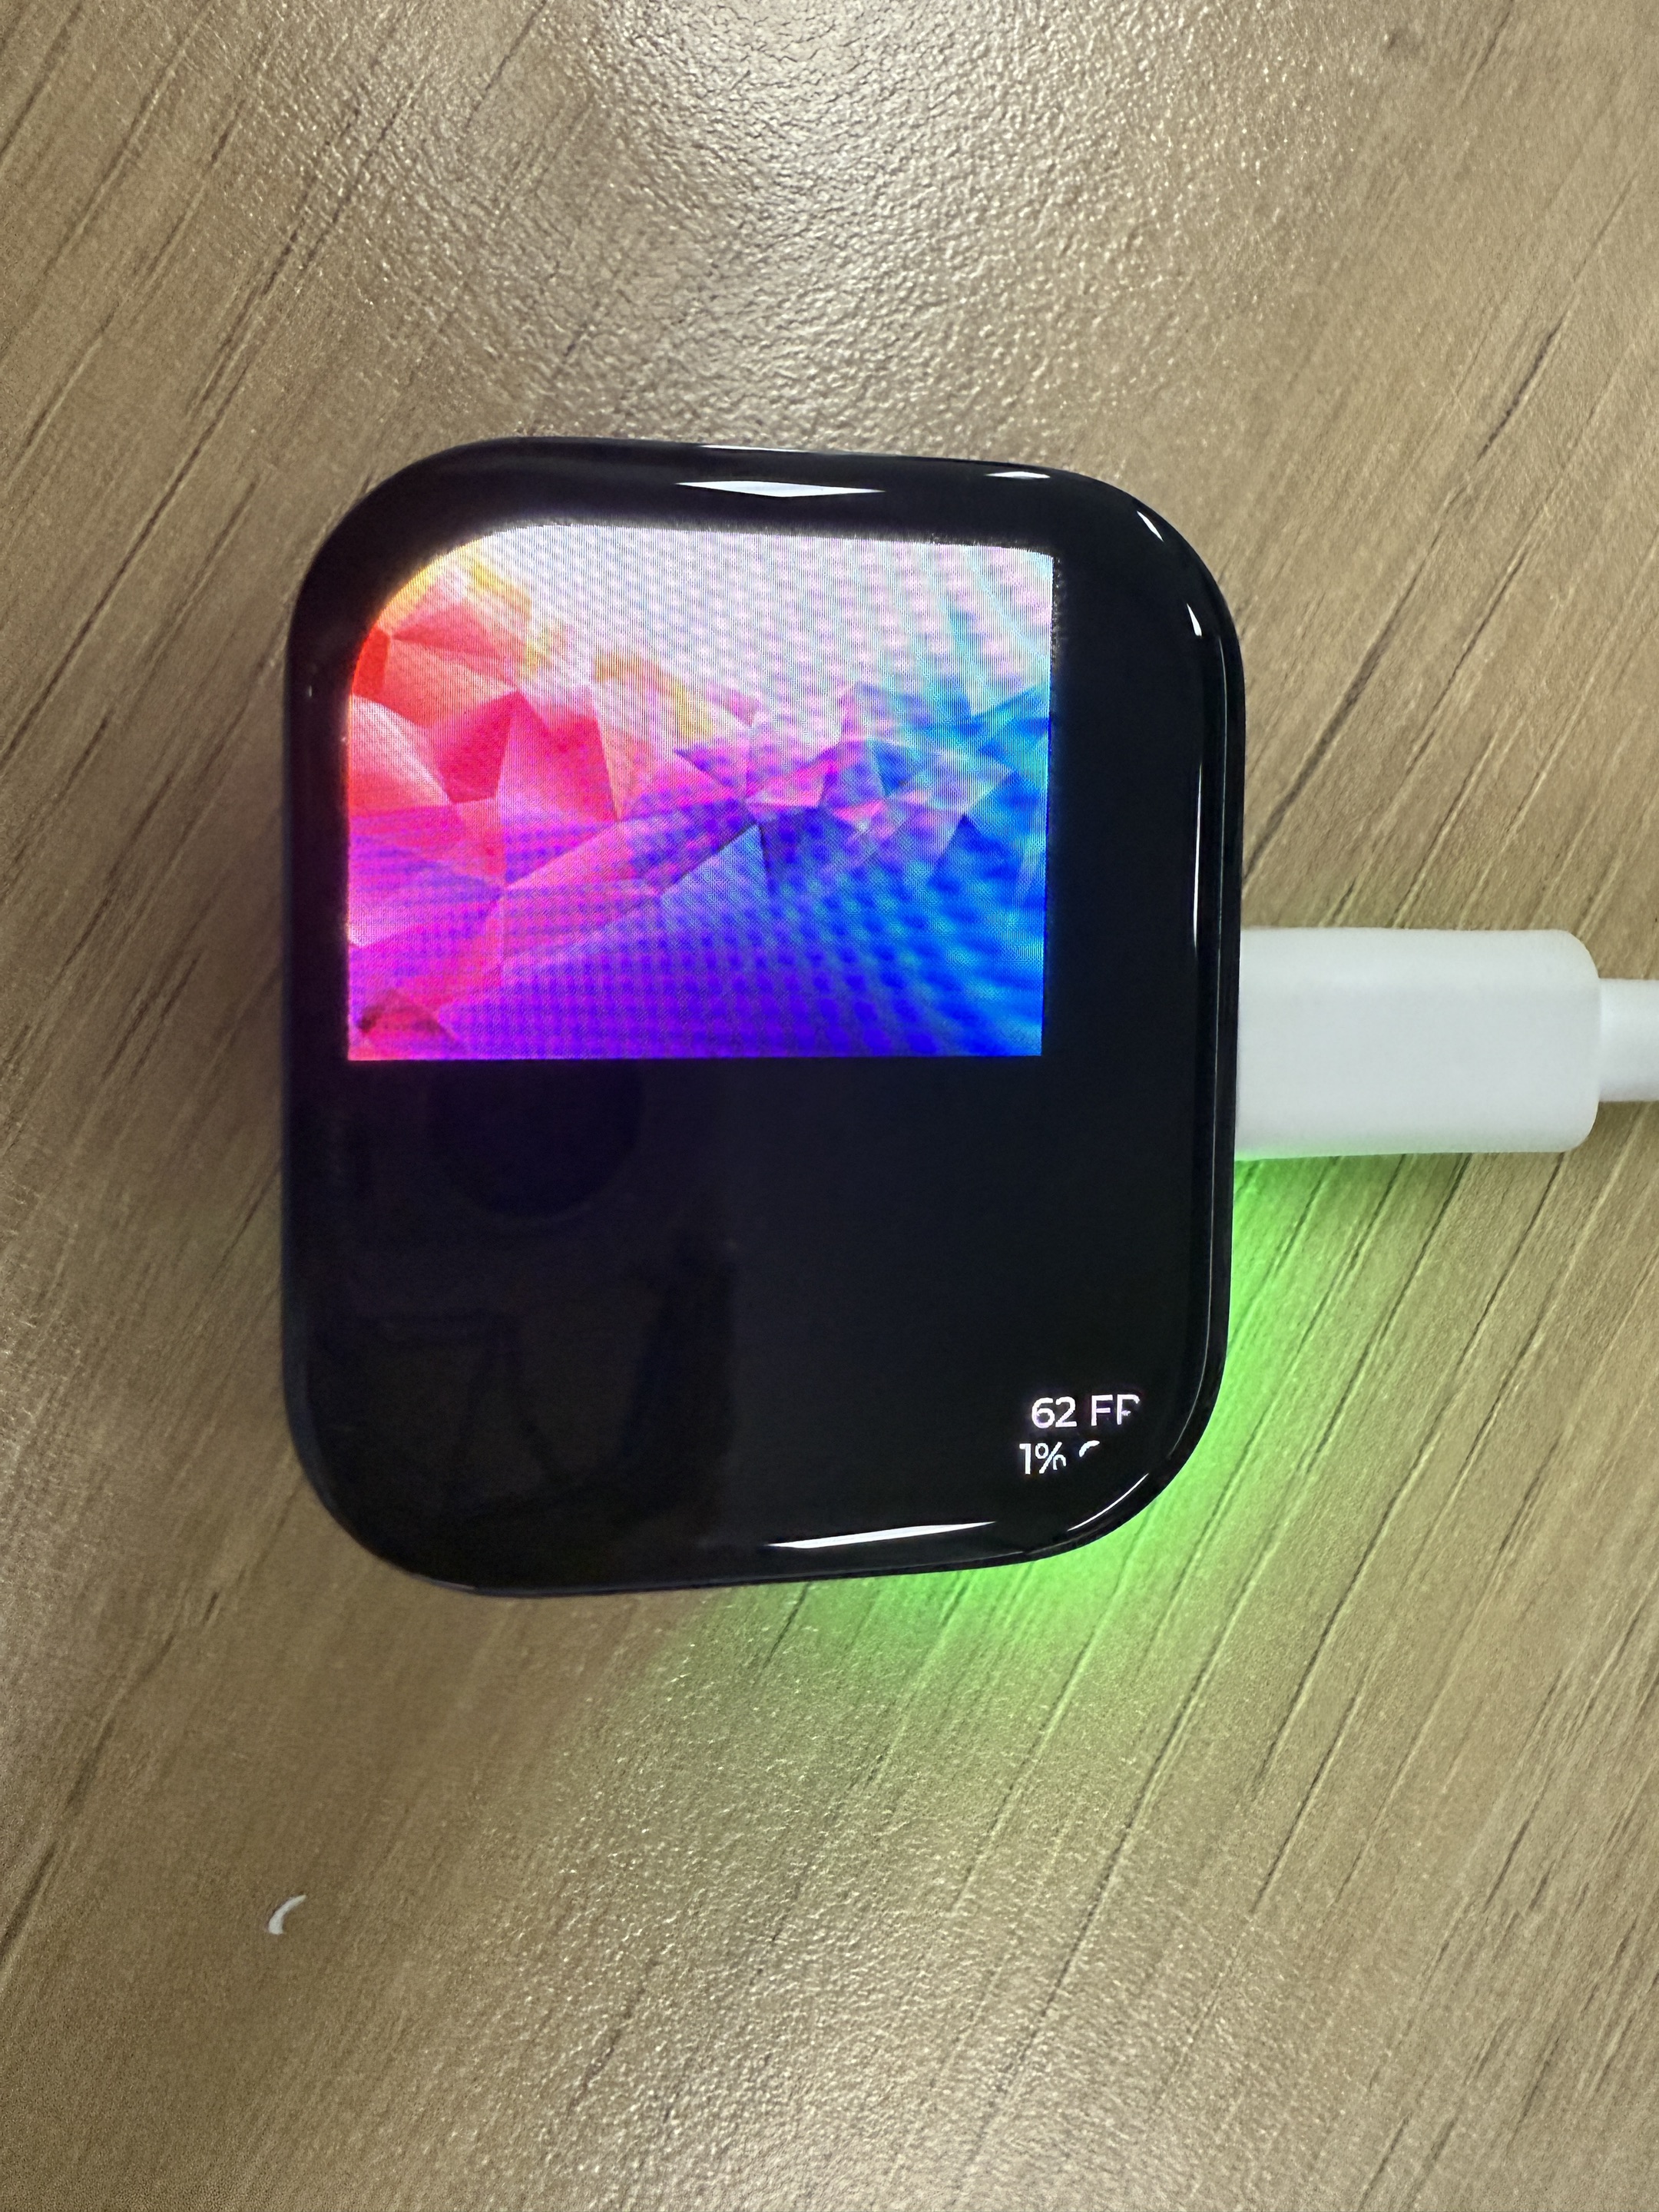
Troubleshooting
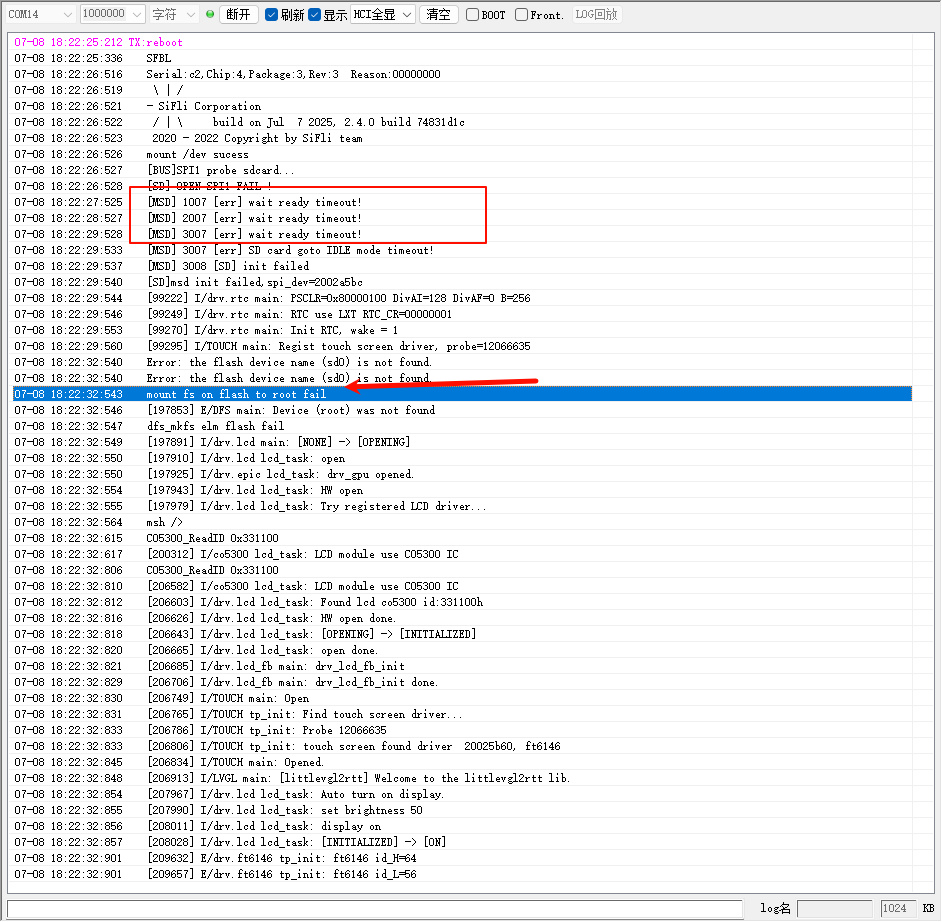
If the following log appears, check that the TF card is inserted securely and can communicate over the SPI bus.